
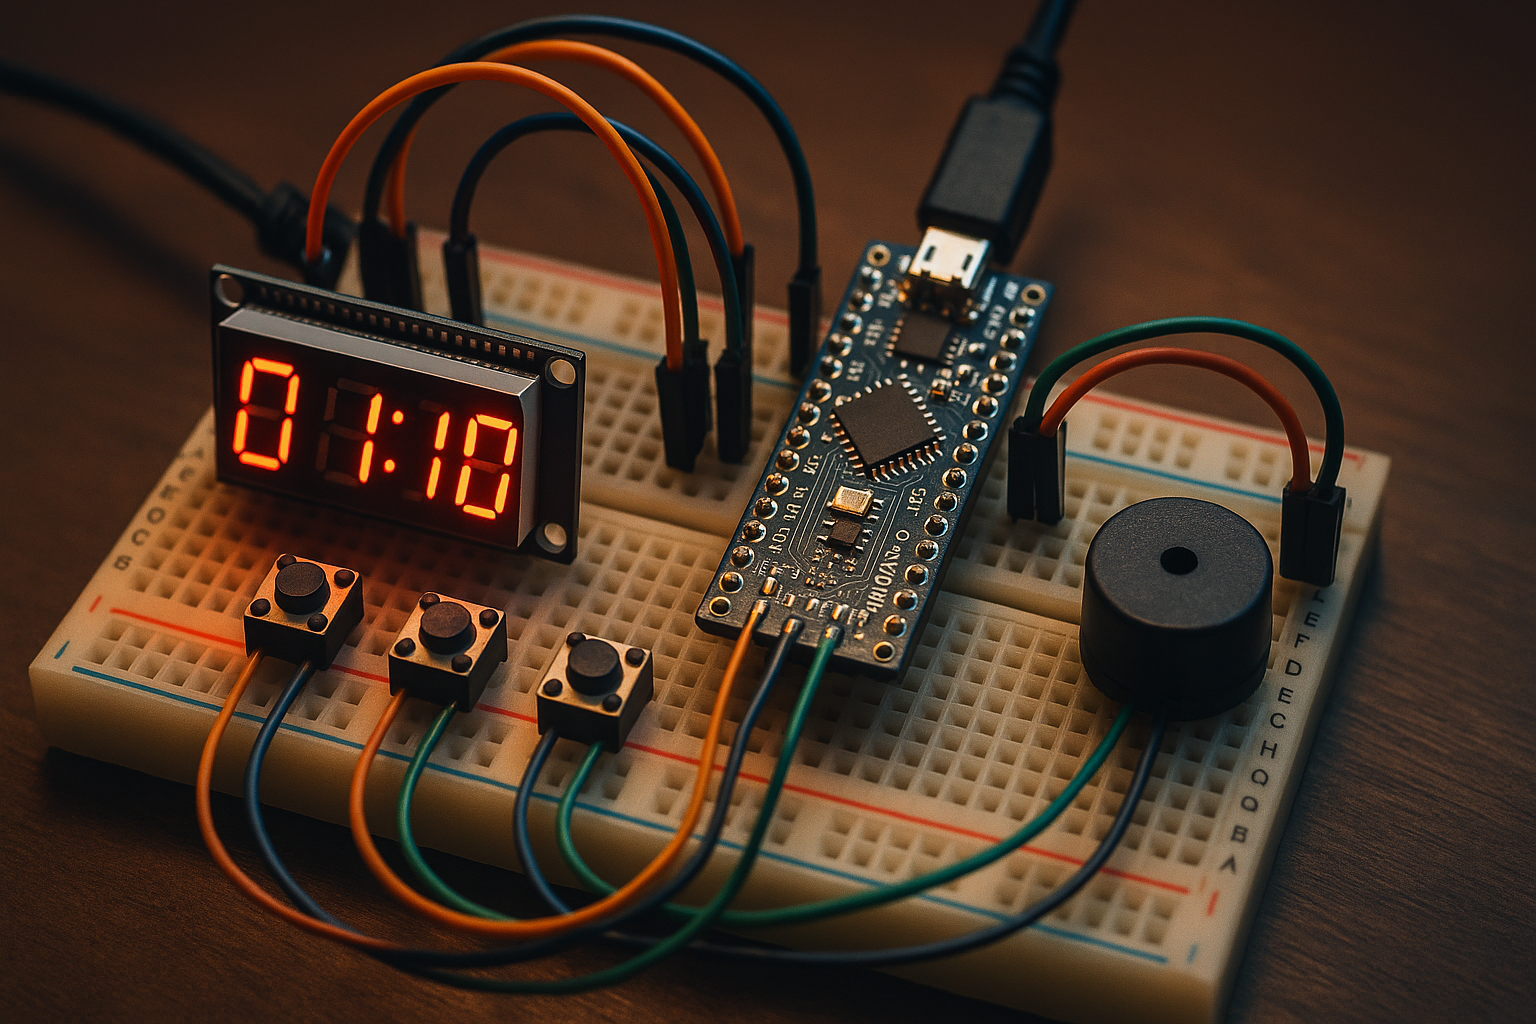
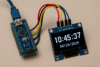
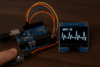
The Arduino countdown timer is a compact and user-friendly project designed to let you set and run a timer using physical buttons, with real-time feedback on a 4-digit TM1637 LED display. You can adjust minutes and seconds separately, start or reset the countdown, and receive a clear audible alert via a buzzer when time runs out.
It’s perfect for learning basic embedded system concepts like digital input (buttons), timing with millis(), and output control (LED display, buzzer)—all while creating something practical and interactive. Ideal for beginner to intermediate Arduino enthusiasts!
✅ Features
- Increments by 10 seconds using
BUTTON_UP BUTTON_RESETstarts/stops the timer- Shows
MM:SSusing colon - Buzzes 5 times when time is up
Hardware:
- 1x 4-digit 7-segment display (common cathode, e.g., TM1637-based or raw segments)
- 2x push buttons
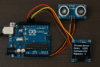
- Arduino UNO or compatible
- (Optional) Buzzer for alarm
- Resistors for buttons (if not using internal pullups)
I’ll assume you’re using a TM1637 4-digit 7-segment display
📦 Required Library
Install the TM1637Display library from Library Manager.
🧰 Components and Connections
| Component | Arduino Pin | Description |
|---|---|---|
| TM1637 CLK | D2 | Clock |
| TM1637 DIO | D3 | Data |
| Button 1 | D4 | Increment Minutes |
| Button 2 | D5 | Increment Seconds |
| Button 3 | D7 | Start / Reset |
| Buzzer | D6 | Optional buzzer for alarm |
🧪 Features Summary
- Button 1 (D4): Add 1 minute (wraps at 59)
- Button 2 (D5): Add 10 seconds (wraps at 59)
- Button 3 (D7): Start/stop/reset the timer
- Buzzer (D6): Buzzes 5 times at the end
🧠 Functionality Overview
You use three push buttons to:
- Set minutes (
Button 1) - Set seconds (
Button 2) - Start or reset the timer (
Button 3)
The 4-digit TM1637 display shows the time in MM:SS format.
When the countdown reaches zero, a buzzer sounds to alert you.
🔁 Step-by-Step Flow
1. 🔧 Setting the Time (Before Countdown)
- Button 1 (Minutes):
- Press it to increase the minutes (0–59).
- Each press adds 1 minute.
- Rolls over after 59 back to 0.
- Button 2 (Seconds):
- Press to increase seconds by 10 seconds.
- Rolls over after 59 back to 0.
- The current setting is displayed as
MM:SSon the 4-digit display.
2. ▶️ Starting the Countdown
- Press Button 3 (Start/Reset):
- If a time has been set (not 00:00), countdown begins.
- Time decreases every second.
- You cannot adjust minutes or seconds during countdown.
3. ⏳ While Counting Down
- The display updates every second.
- It continues until it reaches 00:00.
4. 🔔 When Countdown Ends
- The buzzer (D6) turns on and off 5 times.
- Timer stops and display remains at 00:00.
5. 🔁 Reset or Set New Time
- Press Button 3 again:
- Stops the countdown and resets to the last configured minutes/seconds.
- You can now adjust the time again using Buttons 1 and 2.
📺 Display Example
If you:
- Press Button 1 → sets minutes to 1 (
01:00) - Press Button 2 → adds 10 seconds (
01:10) - Press Button 3 → countdown starts from
01:10 - At 0 → buzzer sounds 5 times
✅ Summary of Controls
| Action | Button | Function |
|---|---|---|
| Increase Minutes | Button 1 (D4) | Adds 1 minute (wraps at 59) |
| Increase Seconds | Button 2 (D5) | Adds 10 seconds (wraps at 59) |
| Start/Stop/Reset Countdown | Button 3 (D7) | Starts or stops timer |
| Buzzer | D6 | Buzzes when time = 00:00 |
✅ Arduino Code Arduino_CountDown_Timer.ino
#include <TM1637Display.h>

#define CLK 2
#define DIO 3
#define BUTTON_MINUTES 4
#define BUTTON_SECONDS 5
#define BUTTON_START 7
#define BUZZER 6

TM1637Display display(CLK, DIO);

int setMinutes = 0;
int setSeconds = 0;
int remainingTime = 0;
bool counting = false;
unsigned long lastUpdate = 0;

void setup() {
  pinMode(BUTTON_MINUTES, INPUT_PULLUP);
  pinMode(BUTTON_SECONDS, INPUT_PULLUP);
  pinMode(BUTTON_START, INPUT_PULLUP);
  pinMode(BUZZER, OUTPUT);
  digitalWrite(BUZZER, LOW);

  display.setBrightness(5);
  showTime(setMinutes * 60 + setSeconds);
}

void loop() {
  if (!counting) {
    // Adjust minutes
    if (!digitalRead(BUTTON_MINUTES)) {
      delay(200);  // Debounce
      setMinutes = (setMinutes + 1) % 60;
      showTime(setMinutes * 60 + setSeconds);
    }

    // Adjust seconds
    if (!digitalRead(BUTTON_SECONDS)) {
      delay(200);  // Debounce
      setSeconds = (setSeconds + 10) % 60;
      showTime(setMinutes * 60 + setSeconds);
    }
  }

  // Start or reset
  if (!digitalRead(BUTTON_START)) {
    delay(200);  // Debounce
    if (!counting && (setMinutes > 0 || setSeconds > 0)) {
      remainingTime = setMinutes * 60 + setSeconds;
      counting = true;
      lastUpdate = millis();
    } else {
      counting = false;
      showTime(setMinutes * 60 + setSeconds);
    }
  }

  // Countdown logic
  if (counting && millis() - lastUpdate >= 1000) {
    lastUpdate = millis();
    if (remainingTime > 0) {
      remainingTime--;
      showTime(remainingTime);
    }

    if (remainingTime == 0) {
      counting = false;
      soundBuzzer();
    }
  }
}

void showTime(int totalSeconds) {
  int minutes = totalSeconds / 60;
  int seconds = totalSeconds % 60;
  int timeToDisplay = minutes * 100 + seconds;  // MMSS
  display.showNumberDecEx(timeToDisplay, 0b01000000, true);
}

void soundBuzzer() {
  for (int i = 0; i < 5; i++) {
    digitalWrite(BUZZER, HIGH);
    delay(200);
    digitalWrite(BUZZER, LOW);
    delay(200);
  }
}
🧾 Conclusion
The Arduino countdown timer project is a practical and rewarding way to explore core concepts of embedded systems—button input, time management, and visual/audio feedback. Using an Arduino Micro, a TM1637 4-digit display, push buttons, and a buzzer, you can create a fully functional and customizable timer.
This project reinforces understanding of:
- Handling user input
- Displaying time in a user-friendly MM:SS format
- Using timers and non-blocking delays
- Triggering actions like alarms when time expires
It’s simple enough for beginners but provides enough flexibility for expansion—such as adding EEPROM storage, long-press functions, or touch controls. A great stepping stone into the world of interactive electronics!


