
Here’s a complete outline and Arduino sketch for controlling a solenoid Gate lock using a fingerprint scanner, displaying status on a 0.91-inch I2C OLED (128×32 or 128×64), and storing/recognizing fingerprints.
🧰 Required Components
- Arduino Uno / Nano / Mega / ESP8266 / ESP32 (any)
- Fingerprint sensor (e.g., R307 or GT-521F52 or AS608)
- 12V Solenoid lock (with N-channel MOSFET like IRF540N or relay module)
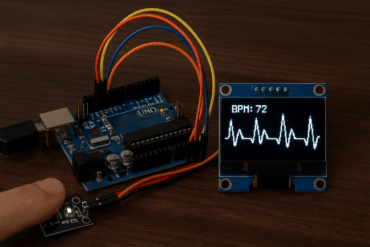
- 0.91-inch I2C OLED (128×32 or 128×64) – SSD1306
- 12V power supply (for solenoid)
- Breadboard, jumper wires
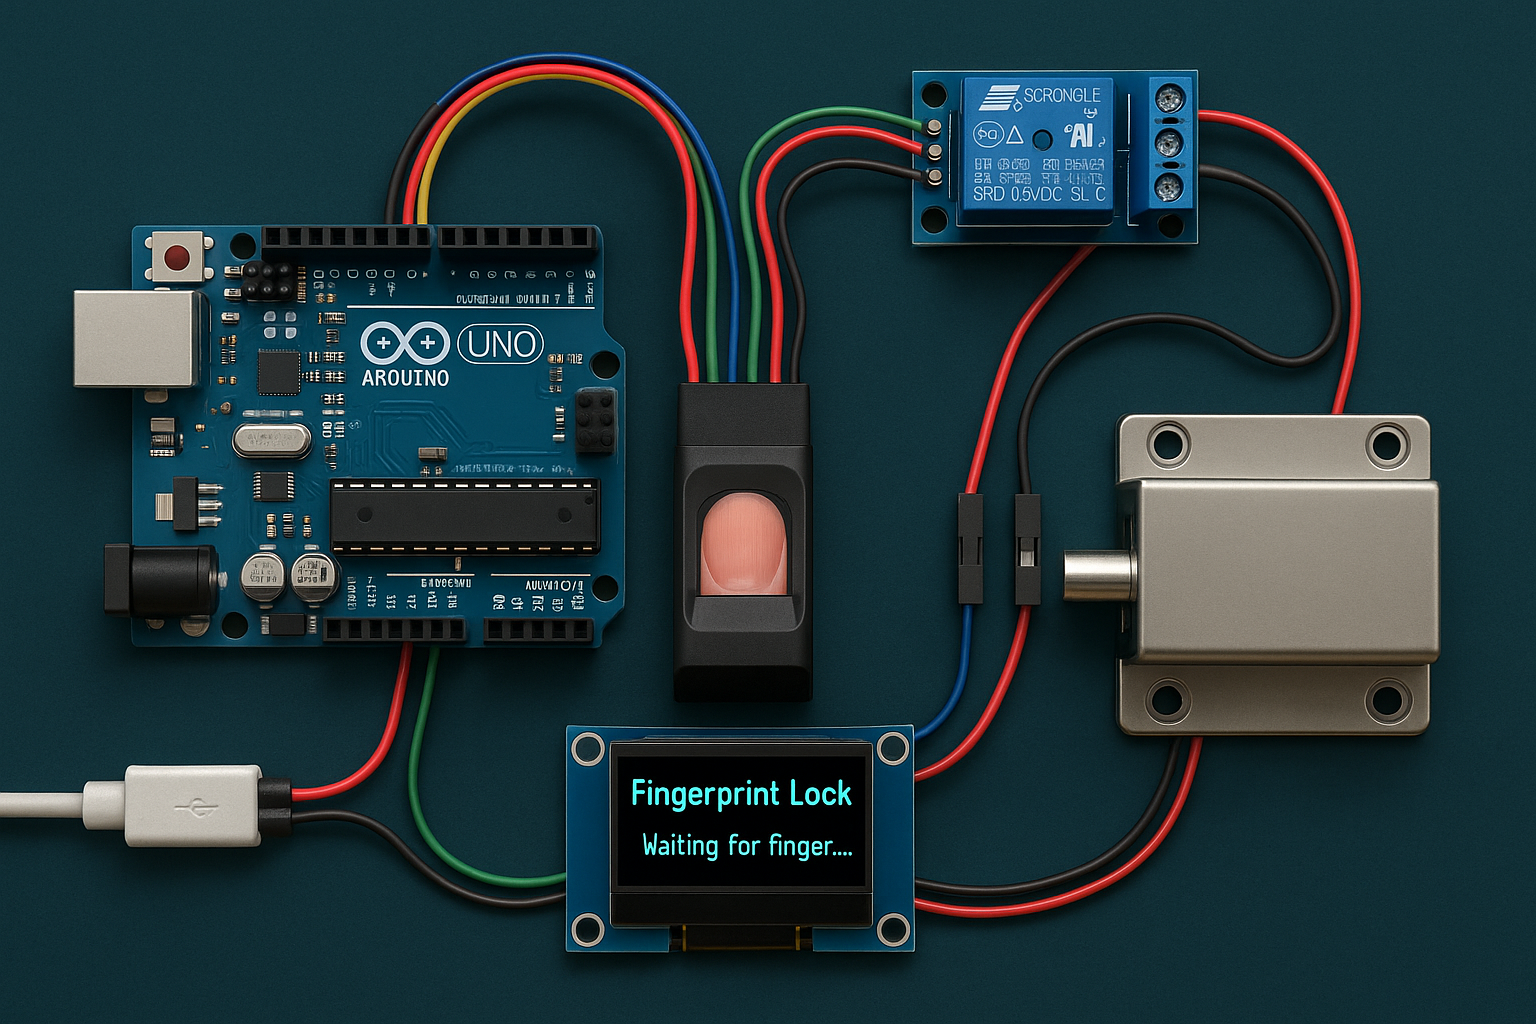
🔌 Wiring Diagram (example)
Fingerprint Sensor (R307):
| Sensor Pin | Arduino Pin |
|---|---|
| VCC | 5V |
| GND | GND |
| TX | D2 |
| RX | D3 |
Uses SoftwareSerial for communication.
OLED (I2C SSD1306):
| OLED Pin | Arduino Pin |
|---|---|
| VCC | 5V |
| GND | GND |
| SCL | A5 (Uno) |
| SDA | A4 (Uno) |
Solenoid Lock:
- Connect one side to 12V power
- Other side to drain of MOSFET
- MOSFET source to GND
- Gate controlled by Arduino digital pin via 220Ω resistor
📦 Libraries Required
- Adafruit_Fingerprint
- Adafruit_GFX
- Adafruit_SSD1306
- Wire
Install via Library Manager.
📇 How to Enroll Fingerprints
Run this example:
File → Examples → Adafruit Fingerprint Sensor Library → enroll
Upload and use the Serial Monitor to assign fingerprints to IDs (e.g., ID 1, 2, etc.)
🛡️ Notes
- Use a MOSFET or relay to switch the solenoid, not directly from Arduino.
- If using an ESP32, you can skip Software Serial and use a second hardware UART.
Here’s a step-by-step explanation of how the fingerprint-based solenoid lock system works:
🔄 System Workflow
1. Initialization
- When the system starts:
- The OLED displays a welcome message (
"Fingerprint Lock"). - The fingerprint sensor is initialized and checked to ensure it’s working.
- The solenoid pin is set to
LOW, meaning the gate is locked by default.
- The OLED displays a welcome message (
2. Waiting for Finger
- The OLED displays:
"Waiting for finger...". - The system constantly waits for someone to place their finger on the scanner.
3. Fingerprint Scanning
- When a finger is placed:
- The sensor captures the fingerprint image.
- It converts the image to a template.
- Then it compares the scanned template with the fingerprints stored in its internal memory.
4. Matching Fingerprint
- ✅ If a match is found:
- The matched ID number is displayed on the OLED (e.g.,
"Welcome, ID #2"). - The solenoid is activated by setting its control pin HIGH, which unlocks the gate.
- OLED shows
"Unlocking...". - After 1 seconds, the solenoid is turned off, locking the gate again.
- The matched ID number is displayed on the OLED (e.g.,
- ❌ If no match is found:
- OLED shows
"Access Denied". - The system waits for a new fingerprint scan.
- OLED shows
📇 Storing Fingerprints
- You must run the
enrollexample sketch (provided by the Adafruit Fingerprint library) once before using the system. - That sketch lets you enroll new users by assigning each fingerprint a unique ID (e.g., ID 1, 2, 3…).
- These fingerprints are stored inside the fingerprint sensor module‘s memory (not the Arduino).
🔒 Solenoid Locking Mechanism
- A 12V solenoid lock is usually locked when unpowered and unlocked when powered.
- The Arduino controls it using a MOSFET or relay, which acts as a switch:
- HIGH → unlock
- LOW → lock
🖥️ OLED Display
- Shows current status:
"Waiting for finger...""Welcome, ID #...""Unlocking...""Access Denied"
🧠 Summary
| Action | Result |
|---|---|
| Finger placed | System scans and compares |
| Match found | Displays ID and unlocks gate |
| No match | Displays Access Denied |
| Idle | Waits for finger, screen updates |
✅ Arduino Code
#include <Adafruit_Fingerprint.h>
#include <Adafruit_GFX.h>
#include <Adafruit_SSD1306.h>
#include <Wire.h>
#include <SoftwareSerial.h>

// OLED config
#define SCREEN_WIDTH 128
#define SCREEN_HEIGHT 32 // Or 64, depending on your screen
#define OLED_RESET -1
Adafruit_SSD1306 display(SCREEN_WIDTH, SCREEN_HEIGHT, &Wire, OLED_RESET);

// Fingerprint config
SoftwareSerial fingerSerial(2, 3); // RX, TX
Adafruit_Fingerprint finger = Adafruit_Fingerprint(&fingerSerial);

// Solenoid lock
#define SOLENOID_PIN 7

void setup() {
  pinMode(SOLENOID_PIN, OUTPUT);
  digitalWrite(SOLENOID_PIN, LOW); // Lock off

  Serial.begin(9600);
  finger.begin(57600);
  if (finger.verifyPassword()) {
    Serial.println("Found fingerprint sensor!");
  } else {
    Serial.println("Fingerprint sensor not found :(");
    while (1);
  }

  // OLED init
  if (!display.begin(SSD1306_SWITCHCAPVCC, 0x3C)) {
    Serial.println("OLED not found");
    while (1);
  }
  display.clearDisplay();
  display.setTextSize(1);
  display.setTextColor(SSD1306_WHITE);
  display.setCursor(0,0);
  display.println("Fingerprint Lock");
  display.display();

  delay(2000);
}

void loop() {
  display.clearDisplay();
  display.setCursor(0,0);
  display.println("Waiting for finger...");
  display.display();

  getFingerprintID();
  delay(50);
}

int getFingerprintID() {
  uint8_t p = finger.getImage();
  if (p != FINGERPRINT_OK) return -1;

  p = finger.image2Tz();
  if (p != FINGERPRINT_OK) return -1;

  p = finger.fingerFastSearch();
  if (p == FINGERPRINT_OK) {
    int id = finger.fingerID;
    Serial.print("Found ID #"); Serial.println(id);

    // Unlock gate
    display.clearDisplay();
    display.setCursor(0,0);
    display.print("Welcome, ID #");
    display.println(id);
    display.println("Unlocking...");
    display.display();

    digitalWrite(SOLENOID_PIN, HIGH);
    delay(1000); // Keep solenoid lock open for 1 sec
    digitalWrite(SOLENOID_PIN, LOW);
    return id;
  } else {
    display.clearDisplay();
    display.setCursor(0,0);
    display.println("Access Denied");
    display.display();
    delay(2000);
    return -1;
  }
}
✅ Conclusion: Arduino Fingerprint-Controlled Gate Lock
This project demonstrates a secure, efficient, and modern access control system using:
- Fingerprint recognition for authentication
- Arduino for core logic and control
- Relay or MOSFET for switching the 12V solenoid gate lock
- A compact I2C OLED display for live status feedback
🔐 Key Benefits:
- High security – only authorized fingerprints can unlock the gate
- User-friendly interface – OLED provides real-time feedback
- Expandable – add features like keypad override, Wi-Fi logging, or mobile alerts
🔧 Next Steps (Optional Enhancements):
- Admin menu to enroll/delete fingerprints via buttons or serial menu
- Add buzzer or LED indicators for sound/light feedback
- Implement battery backup or power fail safety
- Expand to multi-user or multi-door systems


