

₨ 399
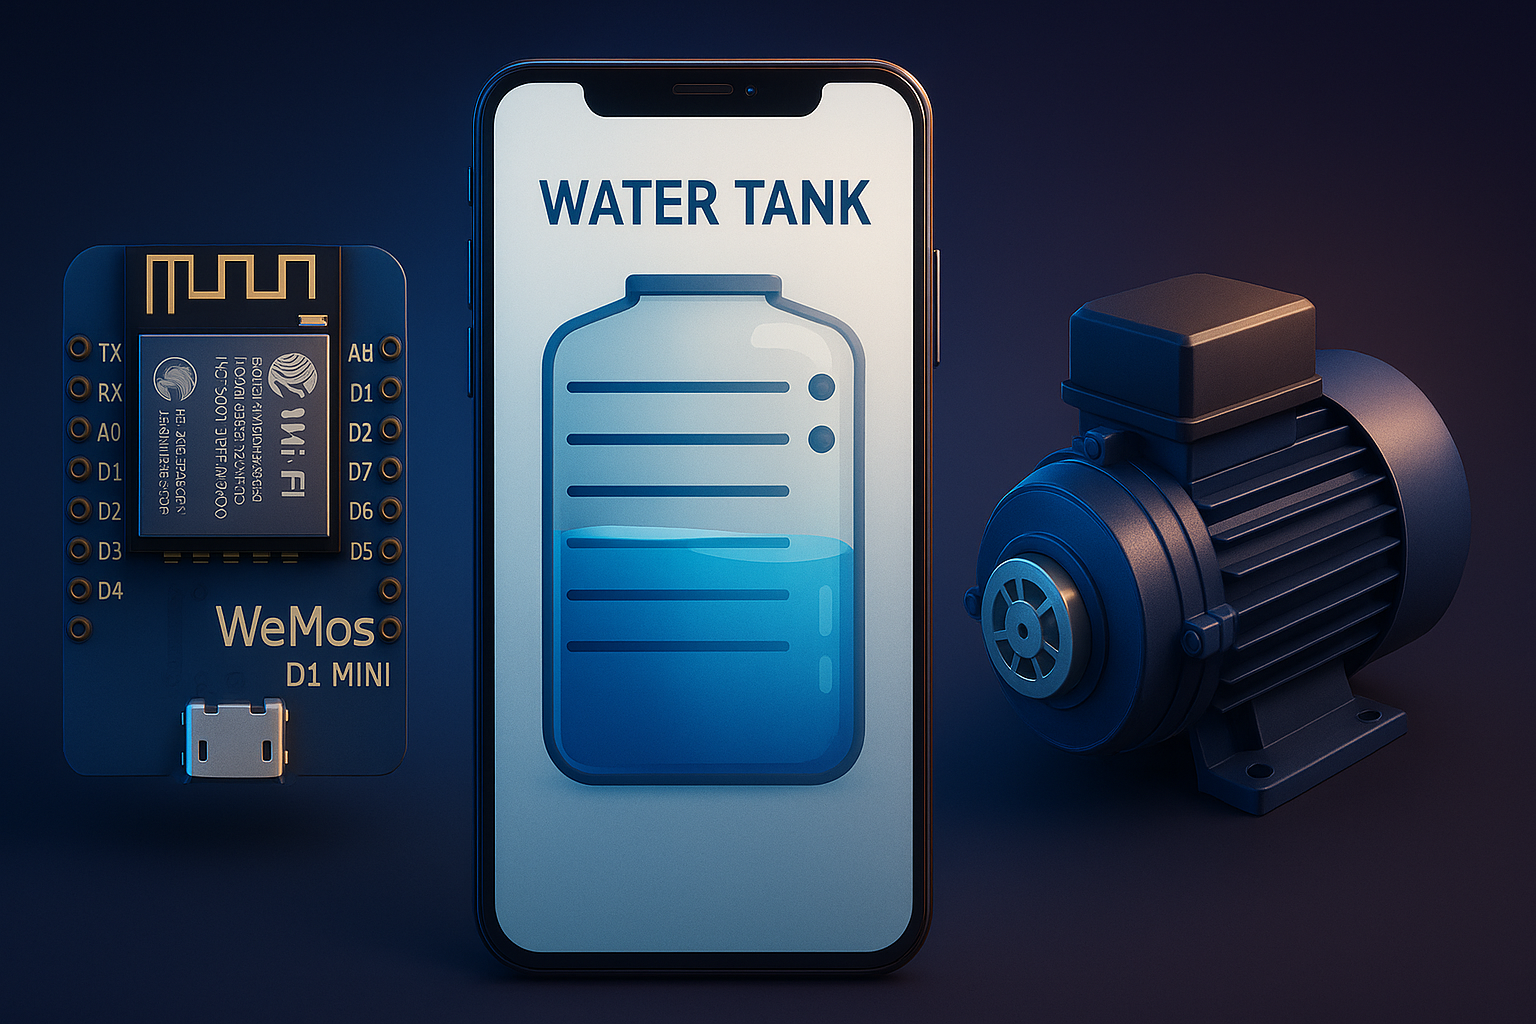
Wi-Fi Based Water Tank Monitoring and Control System Using Wemos D1 Mini
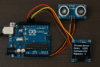
In this tutorial we are going to build a water tank level system with automatic water pump on / off feature by using Wemos D1 mini wi-fi webserver to display water tank level on smartphone, using 4 water level sensors, ability to turn on water pump while water level goes low, turn off water pump while water level goes full level, manually turn on / off water pump from smartphone over wi-fi, let’s start.
You can build a Wi-Fi-based water tank monitoring and control system using a Wemos D1 Mini, four water level sensors, and a water pump. Here’s how the system works:
✅ System Features
- Wi-Fi Web Server (D1 Mini): Hosts a web page to view water level and control the pump.
- Water Level Sensing (4 sensors): Detect tank levels (e.g., EMPTY, LOW, MEDIUM, FULL).
- Automatic Pump Control:
- Turns ON when water level is LOW.
- Turns OFF when water level reaches FULL.
- Manual Pump Control: Control pump manually from smartphone via Wi-Fi.
🔧 Components Required
- 1x Wemos D1 Mini (ESP8266)
- 4x Water level sensors (float switches or conductive sensors)
- 1x Relay module (to switch pump)
- 1x Water pump (with proper voltage rating)
- Jumper wires, 5V power supply
🔌 Wiring Overview
| Sensor Position | GPIO Pin (D1 Mini) |
|---|---|
| FULL | D1 (GPIO5) |
| MEDIUM | D2 (GPIO4) |
| LOW | D3 (GPIO0) |
| EMPTY | D4 (GPIO2) |
| Relay (Pump) | D5 (GPIO14) |
Note: Use pull-up or pull-down resistors if needed based on sensor type.
🧠 Logic Flow
Read all 4 water level sensors.

IF (manual mode == true):
    obey smartphone commands to turn pump ON/OFF
ELSE:
    IF water level <= LOW:
        turn ON pump
    ELSE IF water level == FULL:
        turn OFF pump

Display current water level and pump status on webpage.
🌐 Web Interface Features
- View current water level (e.g., using bars or colors)
- View pump status (ON/OFF)
- Button to manually turn pump ON
- Button to manually turn pump OFF
- Toggle between Auto and Manual mode
💻 Example Code (ESP8266 Arduino Sketch)
Here’s a minimal version of the code:
#include <ESP8266WiFi.h>
#include <ESP8266WebServer.h>

const char* ssid = "YourSSID";
const char* password = "YourPassword";

ESP8266WebServer server(80);

// Pin Definitions
#define FULL_SENSOR D1
#define MED_SENSOR D2
#define LOW_SENSOR D3
#define EMPTY_SENSOR D4
#define PUMP_RELAY D5

bool manualMode = false;
bool manualPumpState = false;

void setup() {
  Serial.begin(115200);
  WiFi.begin(ssid, password);

  pinMode(FULL_SENSOR, INPUT);
  pinMode(MED_SENSOR, INPUT);
  pinMode(LOW_SENSOR, INPUT);
  pinMode(EMPTY_SENSOR, INPUT);
  pinMode(PUMP_RELAY, OUTPUT);
  digitalWrite(PUMP_RELAY, LOW); // OFF

  while (WiFi.status() != WL_CONNECTED) {
    delay(500);
    Serial.print(".");
  }

  Serial.println("WiFi connected");

  server.on("/", handleRoot);
  server.on("/pump/on", []() {
    manualMode = true;
    manualPumpState = true;
    digitalWrite(PUMP_RELAY, HIGH);
    server.send(200, "text/html", "Pump turned ON manually");
  });

  server.on("/pump/off", []() {
    manualMode = true;
    manualPumpState = false;
    digitalWrite(PUMP_RELAY, LOW);
    server.send(200, "text/html", "Pump turned OFF manually");
  });

  server.on("/mode/auto", []() {
    manualMode = false;
    server.send(200, "text/html", "Switched to AUTO mode");
  });

  server.begin();
}

void loop() {
  server.handleClient();

  if (!manualMode) {
    bool full = digitalRead(FULL_SENSOR);
    bool low = digitalRead(LOW_SENSOR);

    if (!full && low) {
      digitalWrite(PUMP_RELAY, HIGH); // Turn pump ON
    } else if (full) {
      digitalWrite(PUMP_RELAY, LOW); // Turn pump OFF
    }
  } else {
    digitalWrite(PUMP_RELAY, manualPumpState ? HIGH : LOW);
  }
}

void handleRoot() {
  String html = "<h1>Water Tank Status</h1>";
  html += "<p>Manual Mode: " + String(manualMode ? "ON" : "OFF") + "</p>";
  html += "<p>Pump State: " + String(digitalRead(PUMP_RELAY) ? "ON" : "OFF") + "</p>";
  html += "<a href='/pump/on'>Pump ON</a><br>";
  html += "<a href='/pump/off'>Pump OFF</a><br>";
  html += "<a href='/mode/auto'>Auto Mode</a><br>";
  server.send(200, "text/html", html);
}
📱 Access Web Server on Phone
- Connect smartphone to the same Wi-Fi as D1 Mini.
- Enter the D1 Mini’s IP (found via Serial Monitor) into your browser.
- Control and view tank status.
🛡️ Tips
- Consider using debounce logic if float switches flicker.
- Use opto-isolated relay module for pump safety.
- Secure web interface if exposed outside local network.
✅ Updated Manual Mode Logic
Even in manual mode:
- If water level is FULL, pump must turn OFF, overriding manual state.
- If water level is already FULL, ignore manual ON command (don’t allow turning pump on).
🔄 Updated Code Snippet (Modified Sections Only)
Replace your existing manual ON handler and loop() logic with the following:
🔧 Manual Pump ON Endpoint – With Safety Check
server.on("/pump/on", []() {
  if (digitalRead(FULL_SENSOR)) {
    server.send(200, "text/html", "Tank is full. Cannot turn on pump.");
  } else {
    manualMode = true;
    manualPumpState = true;
    digitalWrite(PUMP_RELAY, HIGH);
    server.send(200, "text/html", "Pump turned ON manually.");
  }
});
🔁 Updated loop() Function – Auto-Off on Full Level in Manual Mode
void loop() {
  server.handleClient();

  bool full = digitalRead(FULL_SENSOR);
  bool low = digitalRead(LOW_SENSOR);

  if (full) {
    // Always turn off pump when tank is full (auto safety)
    digitalWrite(PUMP_RELAY, LOW);
    manualPumpState = false;
  } else if (!manualMode) {
    // Automatic mode logic
    if (low) {
      digitalWrite(PUMP_RELAY, HIGH); // Turn pump ON
    } else {
      digitalWrite(PUMP_RELAY, LOW);  // Turn pump OFF
    }
  } else {
    // Manual mode, only allow if not full
    digitalWrite(PUMP_RELAY, manualPumpState ? HIGH : LOW);
  }
}
✅ Summary of Features Now
- Manual mode allows user control only if tank is not full.
- If tank becomes full during manual mode, pump auto shuts off.
- Manual mode won’t allow turning on pump when tank is already full.
- Safe and semi-automatic protection built-in.
Would you like this updated into a full HTML+CSS mobile-friendly UI or a visual flow diagram of the logic?
Let’s enhance the web interface for your water tank system with a fancy, mobile-friendly UI that includes:
🌟 Features
- Live Water Tank Visualization
- Status Indicators (Pump, Mode, Water Level)
- Stylish Buttons (Manual/Auto Mode, Pump ON/OFF)
- Responsive Design (mobile & desktop)
💻 Enhanced Web Interface Code
Replace your handleRoot() function with the following code:
✅ handleRoot() Function (Fancy HTML + CSS)
void handleRoot() {
  bool full = digitalRead(FULL_SENSOR);
  bool med = digitalRead(MED_SENSOR);
  bool low = digitalRead(LOW_SENSOR);
  bool empty = digitalRead(EMPTY_SENSOR);
  bool pumpState = digitalRead(PUMP_RELAY);

  String html = R"rawliteral(
  <!DOCTYPE html>
  <html>
  <head>
    <title>Water Tank Monitor</title>
    <meta name="viewport" content="width=device-width, initial-scale=1">
    <style>
      body {
        font-family: 'Segoe UI', sans-serif;
        text-align: center;
        background: #f0f4f7;
        padding: 20px;
      }
      h1 {
        color: #333;
      }
      .tank {
        width: 100px;
        height: 300px;
        border: 3px solid #333;
        margin: 20px auto;
        background: #e0e0e0;
        position: relative;
        border-radius: 10px;
        overflow: hidden;
      }
      .level {
        position: absolute;
        width: 100%;
        background: #00bfff;
        bottom: 0;
        transition: height 0.5s;
      }
      .status {
        margin: 10px 0;
        font-size: 18px;
      }
      .btn {
        padding: 10px 20px;
        margin: 5px;
        background: #0077cc;
        color: white;
        border: none;
        border-radius: 5px;
        font-size: 16px;
        cursor: pointer;
        transition: background 0.3s;
      }
      .btn:hover {
        background: #005fa3;
      }
      .btn.red {
        background: #cc0000;
      }
      .btn.green {
        background: #00aa00;
      }
      .mode {
        margin-top: 15px;
        font-weight: bold;
      }
    </style>
  </head>
  <body>
    <h1>🚰 Water Tank Monitor</h1>

    <div class="tank">
      <div class="level" style="height:)rawliteral";

  // Calculate height percentage for water level
  int level = full ? 100 : med ? 66 : low ? 33 : 0;
  html += String(level) + R"rawliteral(%"></div></div>

    <div class="status">Water Level: <strong>)rawliteral";
  html += (full ? "FULL" : med ? "MEDIUM" : low ? "LOW" : "EMPTY");
  html += R"rawliteral(</strong></div>

    <div class="status">Pump: <strong style="color:)rawliteral";
  html += pumpState ? "green" : "red";
  html += R"rawliteral(">)rawliteral";
  html += pumpState ? "ON" : "OFF";
  html += R"rawliteral(</strong></div>

    <div class="status">Mode: <strong>)rawliteral";
  html += manualMode ? "Manual" : "Automatic";
  html += R"rawliteral(</strong></div>

    <div>
      <a href="/pump/on"><button class="btn green">Pump ON</button></a>
      <a href="/pump/off"><button class="btn red">Pump OFF</button></a>
      <a href="/mode/auto"><button class="btn">Auto Mode</button></a>
    </div>

    <div class="mode">Built with ❤️ using Wemos D1 Mini</div>
  </body>
  </html>
  )rawliteral";

  server.send(200, "text/html", html);
}
🖼️ What This Looks Like
- A vertical tank graphic with a blue water level that fills up.
- Colored status indicators for pump and mode.
- Interactive buttons for manual/auto and pump control.
- Clean layout, mobile responsive via CSS.
🚀 Optional Upgrades
Would you like to add:
- Live updates without refresh using JavaScript (AJAX)?
- Progress bar animation for water level?
- Icons or chart graphs?
- Dark mode toggle?
Let’s add AJAX live updates so the web page automatically refreshes water level, pump state, and mode without reloading the whole page.
✅ What We’ll Do:
- Use AJAX (JavaScript) to fetch real-time data from a new
/statusendpoint. - Update the water level, pump state, and mode every few seconds.
- Keep the fancy look and buttons intact.
🧠 Step-by-Step Code Updates
🆕 1. Add /status Endpoint (JSON format)
Add this to your setup():
server.on("/status", []() {
  bool full = digitalRead(FULL_SENSOR);
  bool med = digitalRead(MED_SENSOR);
  bool low = digitalRead(LOW_SENSOR);
  bool empty = digitalRead(EMPTY_SENSOR);
  bool pumpState = digitalRead(PUMP_RELAY);

  String level = full ? "FULL" : med ? "MEDIUM" : low ? "LOW" : "EMPTY";
  int percent = full ? 100 : med ? 66 : low ? 33 : 0;

  String json = "{";
  json += "\"level\":\"" + level + "\",";
  json += "\"percent\":" + String(percent) + ",";
  json += "\"pump\":" + String(pumpState ? "true" : "false") + ",";
  json += "\"mode\":\"" + String(manualMode ? "Manual" : "Automatic") + "\"";
  json += "}";
  server.send(200, "application/json", json);
});
✅ 2. Update handleRoot() – Add JavaScript for Live Updates
In your existing handleRoot() HTML, add this <script> inside <head>, and replace level, status, and mode sections with ids to be updated.
✨ Add This JavaScript:
<script>
function fetchStatus() {
  fetch("/status")
    .then(response => response.json())
    .then(data => {
      document.getElementById("levelLabel").innerText = data.level;
      document.getElementById("levelBar").style.height = data.percent + "%";
      document.getElementById("pumpStatus").innerText = data.pump ? "ON" : "OFF";
      document.getElementById("pumpStatus").style.color = data.pump ? "green" : "red";
      document.getElementById("modeLabel").innerText = data.mode;
    });
}
setInterval(fetchStatus, 2000); // every 2 seconds
window.onload = fetchStatus;
</script>
✅ 3. Modify HTML Elements to Use IDs
Replace this block:
<div class="level" style="height:XX%"></div>With:
<div class="level" id="levelBar" style="height:0%"></div>Replace water level text:
<div class="status">Water Level: <strong id="levelLabel">--</strong></div>Replace pump status:
<div class="status">Pump: <strong id="pumpStatus" style="color:gray">--</strong></div>Replace mode:
<div class="status">Mode: <strong id="modeLabel">--</strong></div>🎯 Final Result
- Web page loads once.
- Then, every 2 seconds, it automatically:
- Updates tank level
- Shows current pump state
- Displays Auto/Manual mode
- No page reloads required ✅
Would you like:
- A dark mode toggle?
- A pump runtime timer?
- LocalStorage to remember UI settings?
Here’s a complete Arduino sketch for your Wemos D1 Mini Water Tank Monitor and Pump Controller, including:
✅ Fancy responsive web UI
✅ Manual & Auto pump control
✅ Auto pump cutoff at FULL level (even in manual mode)
✅ Live AJAX updates every 2 seconds
✅ FULL Arduino Sketch
#include <ESP8266WiFi.h>
#include <ESP8266WebServer.h>

// WiFi credentials
const char* ssid = "YOUR_WIFI_SSID";
const char* password = "YOUR_WIFI_PASSWORD";

// Web server on port 80
ESP8266WebServer server(80);

// GPIO pin definitions
#define FULL_SENSOR D1
#define MED_SENSOR D2
#define LOW_SENSOR D3
#define EMPTY_SENSOR D4
#define PUMP_RELAY D5

// Control variables
bool manualMode = false;
bool manualPumpState = false;

void setup() {
  Serial.begin(115200);
  WiFi.begin(ssid, password);

  pinMode(FULL_SENSOR, INPUT);
  pinMode(MED_SENSOR, INPUT);
  pinMode(LOW_SENSOR, INPUT);
  pinMode(EMPTY_SENSOR, INPUT);
  pinMode(PUMP_RELAY, OUTPUT);
  digitalWrite(PUMP_RELAY, LOW); // Start with pump OFF

  while (WiFi.status() != WL_CONNECTED) {
    delay(500);
    Serial.print(".");
  }
  Serial.println("\nWiFi connected. IP: " + WiFi.localIP().toString());

  // Web routes
  server.on("/", handleRoot);
  server.on("/pump/on", handlePumpOn);
  server.on("/pump/off", handlePumpOff);
  server.on("/mode/auto", handleAutoMode);
  server.on("/status", handleStatus);

  server.begin();
}

void loop() {
  server.handleClient();

  bool full = digitalRead(FULL_SENSOR);
  bool low = digitalRead(LOW_SENSOR);

  if (full) {
    // Always turn off pump at full level
    digitalWrite(PUMP_RELAY, LOW);
    manualPumpState = false;
  } else if (!manualMode) {
    // Auto mode logic
    if (low) {
      digitalWrite(PUMP_RELAY, HIGH);
    } else {
      digitalWrite(PUMP_RELAY, LOW);
    }
  } else {
    // Manual mode logic
    digitalWrite(PUMP_RELAY, manualPumpState ? HIGH : LOW);
  }
}

// HTML UI handler
void handleRoot() {
  String html = R"rawliteral(
    <!DOCTYPE html>
    <html>
    <head>
      <title>Water Tank Monitor</title>
      <meta name="viewport" content="width=device-width, initial-scale=1">
      <style>
        body { font-family: 'Segoe UI', sans-serif; text-align: center; background: #f0f4f7; padding: 20px; }
        h1 { color: #333; }
        .tank { width: 100px; height: 300px; border: 3px solid #333; margin: 20px auto; background: #e0e0e0; position: relative; border-radius: 10px; overflow: hidden; }
        .level { position: absolute; width: 100%; background: #00bfff; bottom: 0; transition: height 0.5s; }
        .status { margin: 10px 0; font-size: 18px; }
        .btn { padding: 10px 20px; margin: 5px; background: #0077cc; color: white; border: none; border-radius: 5px; font-size: 16px; cursor: pointer; transition: background 0.3s; }
        .btn:hover { background: #005fa3; }
        .btn.red { background: #cc0000; }
        .btn.green { background: #00aa00; }
        .mode { margin-top: 15px; font-weight: bold; }
      </style>
      <script>
        function fetchStatus() {
          fetch("/status")
            .then(response => response.json())
            .then(data => {
              document.getElementById("levelLabel").innerText = data.level;
              document.getElementById("levelBar").style.height = data.percent + "%";
              document.getElementById("pumpStatus").innerText = data.pump ? "ON" : "OFF";
              document.getElementById("pumpStatus").style.color = data.pump ? "green" : "red";
              document.getElementById("modeLabel").innerText = data.mode;
            });
        }
        setInterval(fetchStatus, 2000);
        window.onload = fetchStatus;
      </script>
    </head>
    <body>
      <h1>🚰 Water Tank Monitor</h1>
      <div class="tank"><div class="level" id="levelBar" style="height:0%"></div></div>
      <div class="status">Water Level: <strong id="levelLabel">--</strong></div>
      <div class="status">Pump: <strong id="pumpStatus" style="color:gray">--</strong></div>
      <div class="status">Mode: <strong id="modeLabel">--</strong></div>
      <div>
        <a href="/pump/on"><button class="btn green">Pump ON</button></a>
        <a href="/pump/off"><button class="btn red">Pump OFF</button></a>
        <a href="/mode/auto"><button class="btn">Auto Mode</button></a>
      </div>
      <div class="mode">Built with ❤️ on Wemos D1 Mini</div>
    </body>
    </html>
  )rawliteral";

  server.send(200, "text/html", html);
}

// AJAX status endpoint
void handleStatus() {
  bool full = digitalRead(FULL_SENSOR);
  bool med = digitalRead(MED_SENSOR);
  bool low = digitalRead(LOW_SENSOR);
  bool empty = digitalRead(EMPTY_SENSOR);
  bool pumpState = digitalRead(PUMP_RELAY);

  String level = full ? "FULL" : med ? "MEDIUM" : low ? "LOW" : "EMPTY";
  int percent = full ? 100 : med ? 66 : low ? 33 : 0;

  String json = "{";
  json += "\"level\":\"" + level + "\",";
  json += "\"percent\":" + String(percent) + ",";
  json += "\"pump\":" + String(pumpState ? "true" : "false") + ",";
  json += "\"mode\":\"" + String(manualMode ? "Manual" : "Automatic") + "\"";
  json += "}";
  server.send(200, "application/json", json);
}

// Button routes
void handlePumpOn() {
  if (digitalRead(FULL_SENSOR)) {
    server.send(200, "text/html", "Tank is full. Cannot turn on pump.");
  } else {
    manualMode = true;
    manualPumpState = true;
    digitalWrite(PUMP_RELAY, HIGH);
    server.sendHeader("Location", "/");
    server.send(303);
  }
}

void handlePumpOff() {
  manualMode = true;
  manualPumpState = false;
  digitalWrite(PUMP_RELAY, LOW);
  server.sendHeader("Location", "/");
  server.send(303);
}

void handleAutoMode() {
  manualMode = false;
  server.sendHeader("Location", "/");
  server.send(303);
}
🧪 Before Uploading
- Install ESP8266 board support in Arduino IDE (via Board Manager).
- Select Wemos D1 R1 or LOLIN(WEMOS) D1 mini as board.
- Replace
ssidandpasswordwith your Wi-Fi credentials.
📲 Access on Your Phone
- Upload code to the D1 Mini.
- Open Serial Monitor → get IP address.
- Enter the IP address in your phone’s browser.
Would you like:
- A dark mode version of the UI?
- OTA firmware update support?
- Pump runtime tracking (hours on)?
✅ Final Conclusion
You’ve now built a complete IoT-based Water Tank Monitoring System using a Wemos D1 Mini, which includes:
🔧 Key Functionalities:
- Water Level Monitoring using 4 sensors: FULL, MED, LOW, EMPTY
- Automatic Pump Control based on LOW/FULL levels
- Manual Pump Control from smartphone via Wi-Fi
- Failsafe: Pump automatically turns OFF at FULL level, even in manual mode
- Smart Web Dashboard:
- Responsive and mobile-friendly
- Animated tank level display
- AJAX-powered live updates (no refresh needed)
- Intuitive control buttons
📡 Technologies Used:
- ESP8266 (Wemos D1 Mini)
- HTML/CSS/JavaScript (AJAX)
- Arduino IDE & ESP8266WebServer
- Wi-Fi networking
🚀 What You Can Add Next:
- OTA (Over-the-Air) firmware updates
- Email/SMS alerts when tank is low or full
- Logging to Google Sheets / Blynk / MQTT
- Runtime tracking & pump usage analytics
- Dark/light mode toggle
If you’d like help with any of those upgrades or making a PCB, 3D-printed enclosure, or mobile app interface, I’d be happy to guide you.
You’re well on your way to a smart, automated home water system. 💧📲
Relatest posts

Leave Comments


Products
-
 Universal RF Wireless DC 12V 4 CH 433Mhz Remote Control Switch Relay Receiver Module With Remote Control For Smart Home
₨ 2,499
Universal RF Wireless DC 12V 4 CH 433Mhz Remote Control Switch Relay Receiver Module With Remote Control For Smart Home
₨ 2,499
-
 Universal DC 12V 4 CH 433Mhz RF Wireless Remote Control Switch Relay Receiver Module With Remote Control
₨ 2,549
Universal DC 12V 4 CH 433Mhz RF Wireless Remote Control Switch Relay Receiver Module With Remote Control
₨ 2,549
-
 DC 12V 1CH Wireless 433Mhz RF Remote Control Switch Relay Receiver Module for Smart Home
₨ 1,799
DC 12V 1CH Wireless 433Mhz RF Remote Control Switch Relay Receiver Module for Smart Home
₨ 1,799
-
 DC 12V 1CH Wireless 433Mhz RF Remote Control Switch Relay Receiver Module for Smart Home
₨ 1,799
DC 12V 1CH Wireless 433Mhz RF Remote Control Switch Relay Receiver Module for Smart Home
₨ 1,799
-
 CP2102 USB 2.0 to TTL UART Serial Converter Module Replace FT232
₨ 399
CP2102 USB 2.0 to TTL UART Serial Converter Module Replace FT232
₨ 399